Nevron writer height 40

Other How To's

Creating custom shapes

Nevron Draw allows you to create completely custom shapes with few clicks only. To learn more about this feature, click here.

Drawing custom shapes

With Nevron Draw you can draw your own shapes and save them in a custom library. Click here for more details.

Connecting Shapes

Nevron Draw comes with a large number of predefined connector options that can satisfy every need. Check out the main features here.

Organizational Chart

With Nevron Draw you can create advanced organizational charts with just few clicks. Find out how.

Understanding Anchor (main) Shape

With Nevron Draw you can create advanced organizational charts with just few clicks. Find out how.

Create and modify ports

Learn how to create new ports or modify the existing ones to achieve more advanced functionality and looks.

Create custom shapes library

See how you can create reusable custom shapes library and load them any time you need them.

Work with smart shapes

Learn more about the new smart shapes in Nevron Draw and what you can achieve with them.

Work with automatic layouts

Learn more about the automatic layouts in Nevron Draw and what you can achieve with them.

Getting started with Nevron Draw

getting started page properties window

Nevron Draw is a fully featured diagram designer. It contains a wide range of predefined shapes and functionalities. Getting started with it is quite easy - all you need is an idea or a requirement for a diagram you need illustrated.

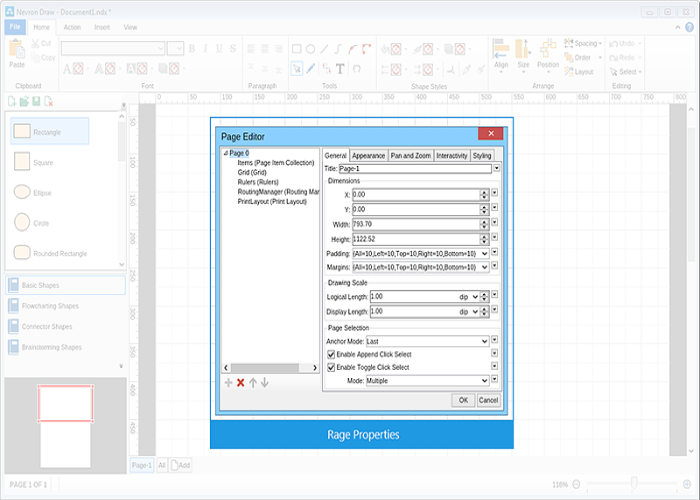
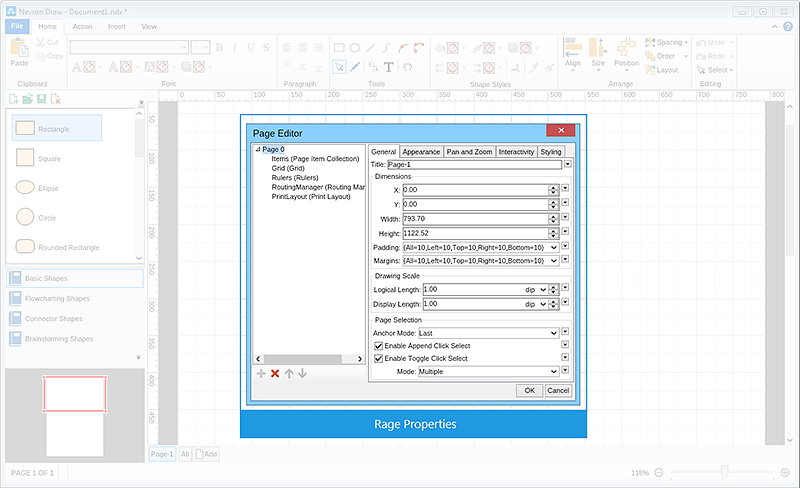
When you open Nevron Draw, it loads (by default) a new blank A4 Portrait orientated page with grid set to "Normal". To change any of the page settings you simply need to go to "File" menu -> "Page Properties". It will open a window with a lot of settings and options for customizing the size and appearance of your page, including Grid options, Rulers, Routing Manager and Printing Layout preferences.
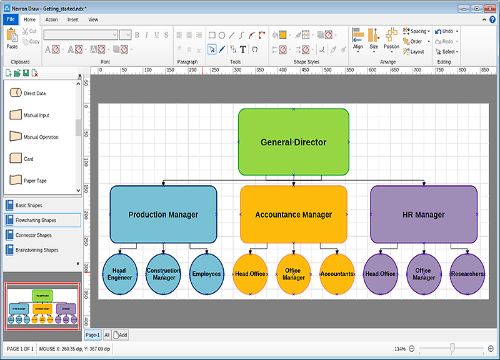
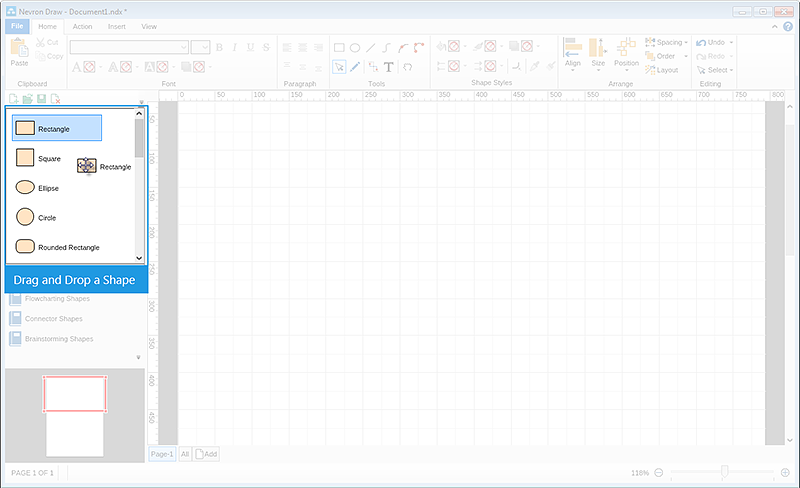
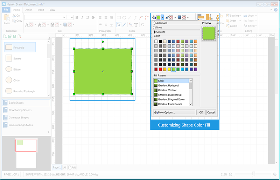
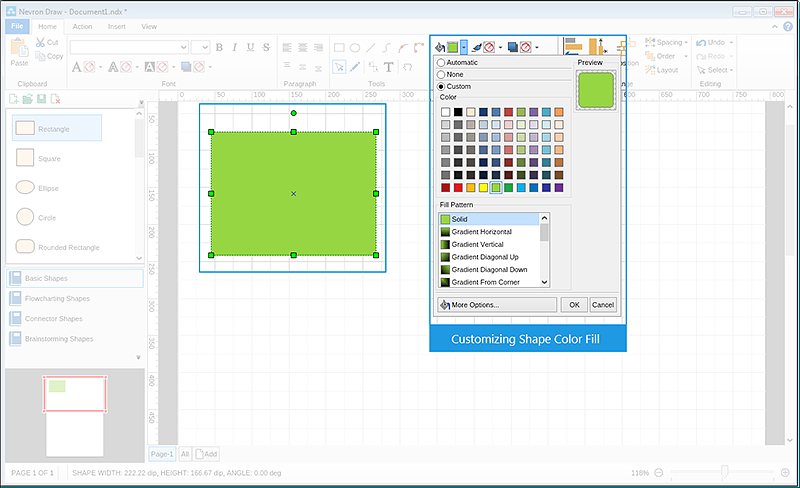
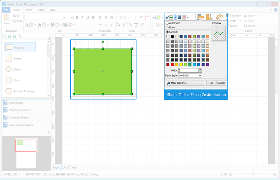
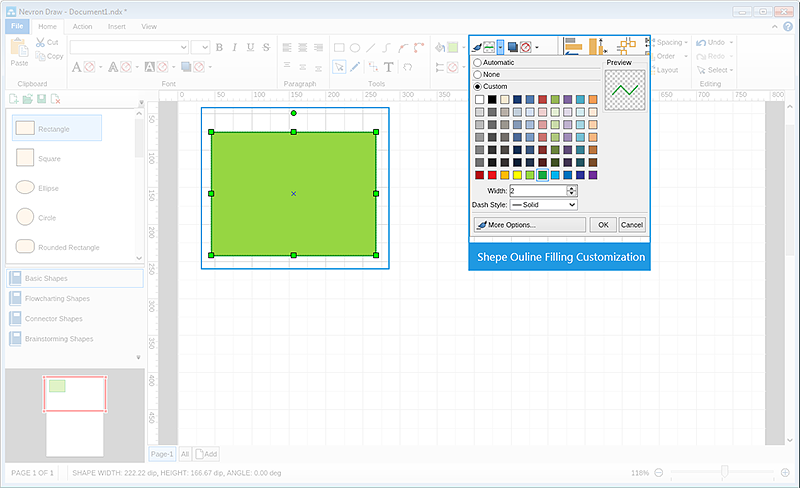
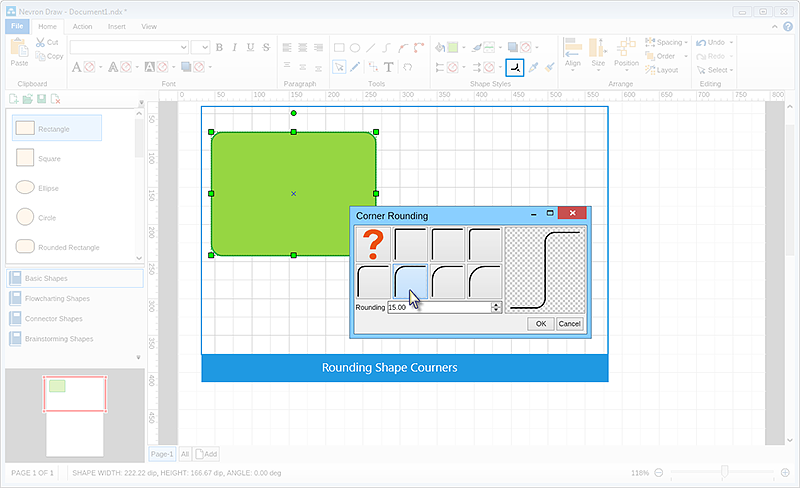
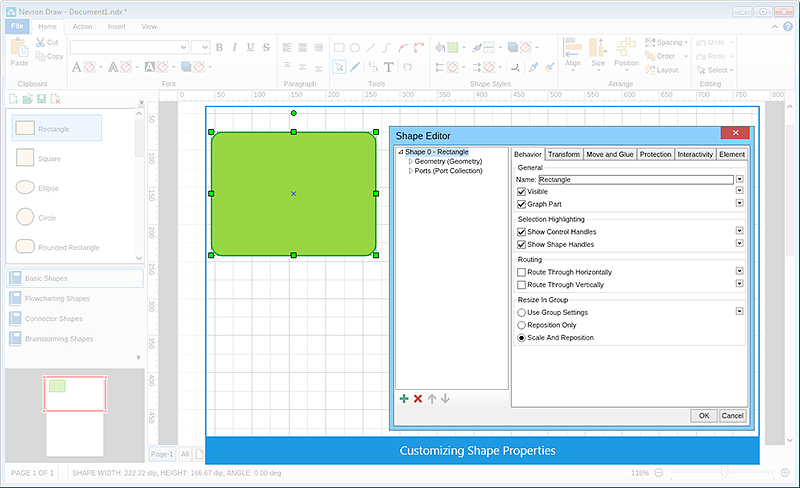
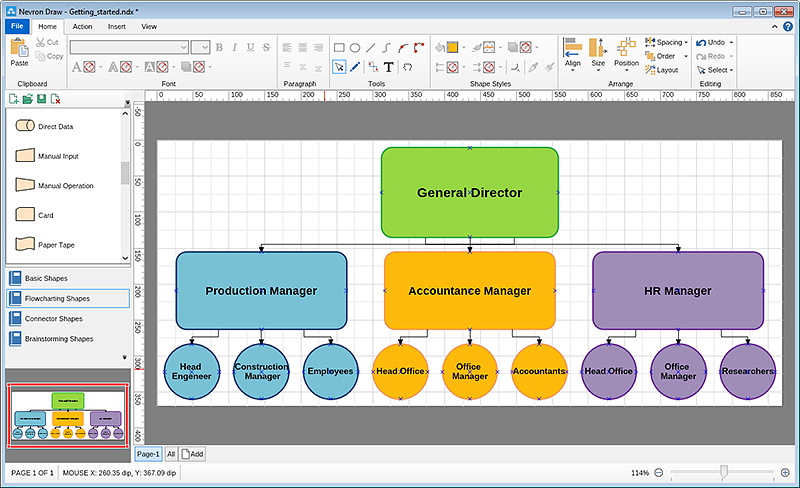
Once you have set your page preferences the next logical step is to start building your diagram. To help you do that Nevron Draw offers many predefined shapes, arranged in four main libraries (Basic Shapes, Flowcharting Shapes, Connector Shapes and Brainstorming Shapes). You can simply drag and drop any shape into the design area. After you have added the shapes you need, you can fully customize it - change the size, color, outline color and even edit the form of the shape itself.
getting started drag and drop shapes
getting started customizing shape color
getting started customizing shape outline color
getting started customizing shape corner rounding
getting started customizing shape properties
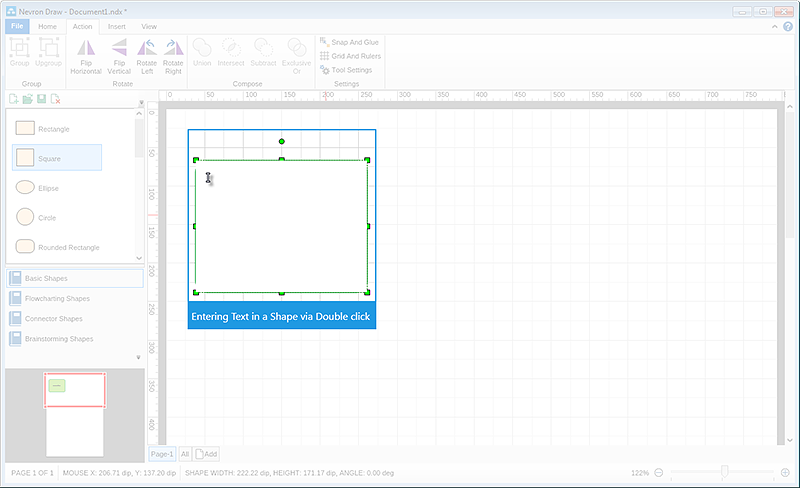
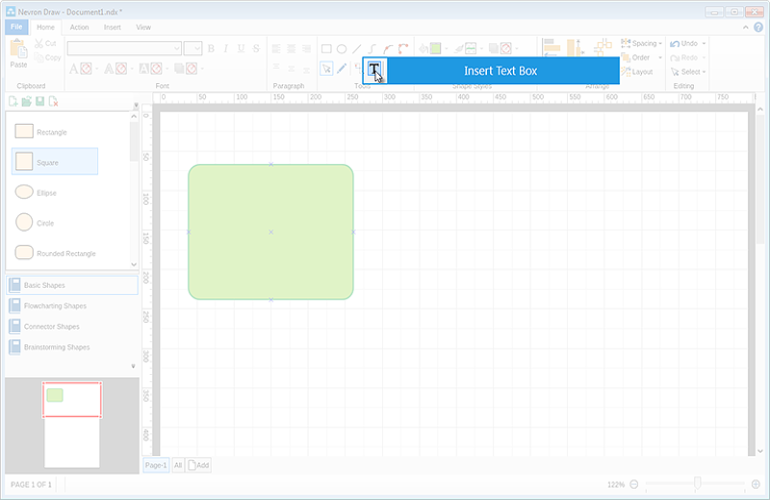
After you have edited the appearance and behavior of you shapes you may want to add some text to them. This is very simple to do – there are two ways to achieve it. Option 1 will be to simply double click on the shape and start typing. Option 2 will be to add a text box with the text tool. With the second option you have a little more flexibility in terms of position the text according to the shape. Of course you can customize the appearance of any text, no matter which option you have chosen.
getting started doble clicking a shape text entering
getting started shape text entering through text tool
getting started diagram final result

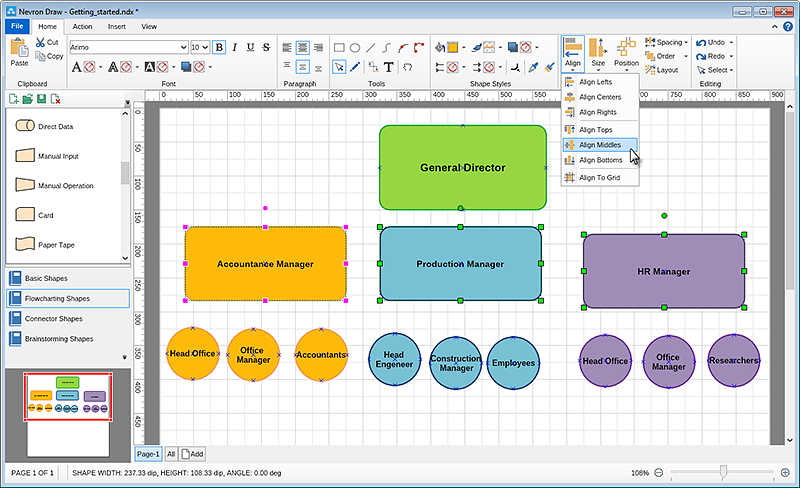
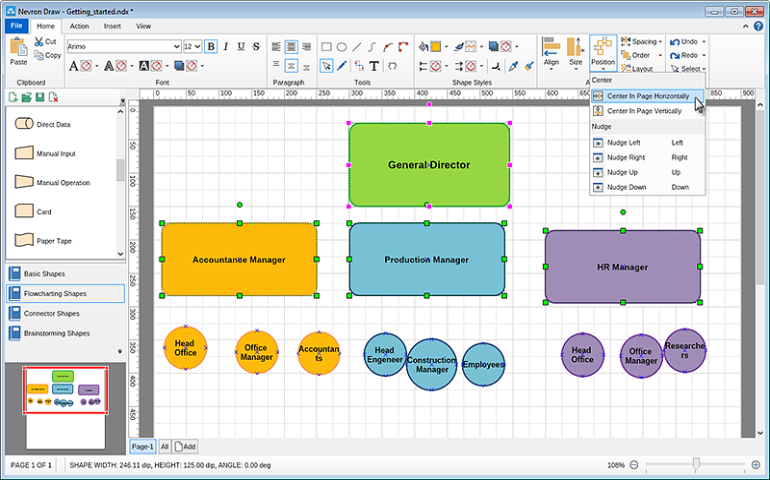
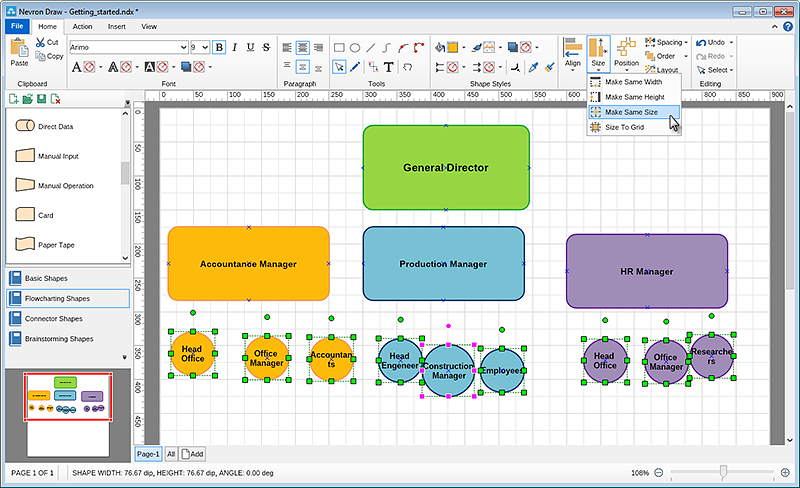
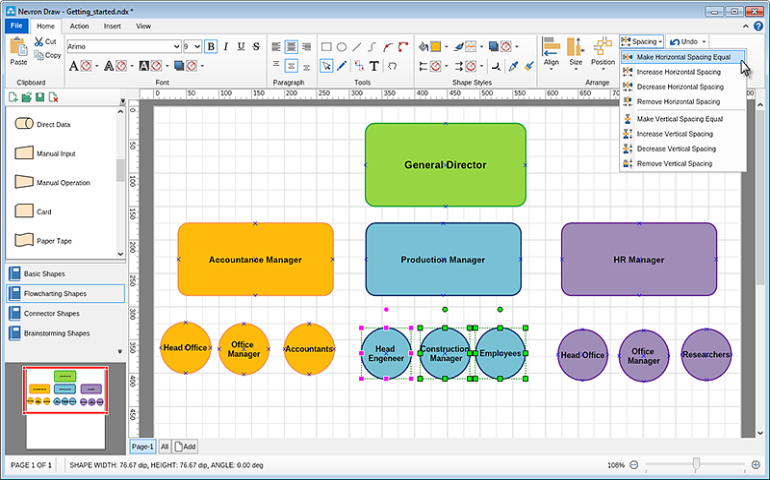
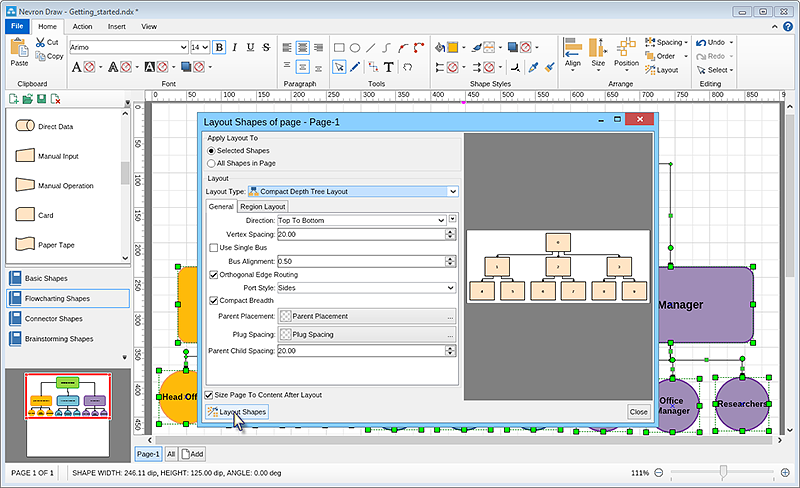
Once you have all of the shapes you need for your diagram formatted, you need to make sure everything is perfect. There are few very helpful tools you can use to make sure the size of all shapes is correct, shapes are well positioned with equal spaces in between, perfectly aligned and the layout is exactly the way it needs to be.

Additional Features

getting started shapes align

Align shapes
To align shapes you need to select all of the shapes you would like to align. The shape with pink squares is considered the Anchor (main) shape by Nevron Draw and all the rest of the selected shapes will be aligned to this one, once you choose the type alignment you need.
getting started shapes connections

Connecting shapes
To connect two shapes simply select the connector type you would like to use. If you select a connector from the Ribbon, you simply need to start at the port of the first shape and end of the port of the second. If you use the Connector Library to select the connector type, you’ll need to drag it into the drawing are of the document and then point its beginning and end positions.

getting started shapes positioning

Positioning shapes
This tool allows you to position a selected shape/s in the Horizontal/Vertical center of the page.
getting started shapes size customizing

Resizing shapes
Usually when creating a diagram it is very important all shapes from one type representing similar items to have exactly the same size. Here comes the very handy tool for shape re-sizing. It allows you to apply the same width, height, or exactly the same size to all the selected shapes (according to the Anchor (main) shape - the one surrounded by pink squares).

getting started shapes spacing

Spacing between shapes
Making the space between the shapes in your diagram equal could be really hard if it has to be done by hand. This is why Nevron Draw provides you with the option to automatically equalize the spacing for you. Besides the usual functionality of distributing the shapes with equal space, Nevron Draw allows you to increase or decrease all spaces simultaneously with a single click.
getting started shapes layout

Layout
The layout functionality allows you to use all predefined layouts that come with Nevron Draw. Nevron Draw provides three main types of automatic layouts and these types are Box layouts, Graph Layouts and Tree Layouts. When you select a layout a preview will open to the right and can change virtually all settings.